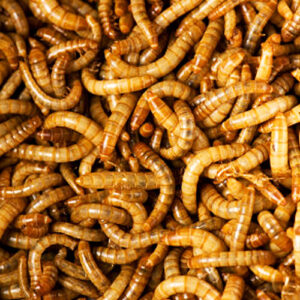
Mealworms make excellent, high-protein food for exotic pets. They are easy to breed and raise, and they provide a valuable source of sustenance for animals that may not be able to eat other types of food. In this blog post, we will discuss the basics of breeding and raising mealworms. We will also provide some tips on how to feed your exotic pet.
Live Mealworms – From 1000 to 10000 count
Mealworms are great for:
- Fishing
- Bird Food
- Reptiles
- Science Projects
- Fun to Raise
How to Find the Right Place for Breeding Mealworms
With regard to the choice of place, there are some things to consider when breeding mealworms.
- Sufficient space for movement: When handling mealworms, you need some space, because various boxes must be placed in the respective room and worked on regularly.
- High dust exposure: mealworm breeding involves high dust exposure. Therefore, choose a space where you can live with the dust. For example, a garage or a garden shed prove to be good options.
- No drafts: over time, mealworms shed their skin. The small “pods” are light as a feather. Therefore, it is important that there is no draught in the room.
You Will Need These Utensils
Before you can start breeding mealworms, you need the right equipment.
Necessary accessories for breeding mealworms themselves:
- Mealworms: To get started, you need to buy live mealworms once. You can get them at a pet store, for example. But you can also buy them from a mealworm breeder.
- Various plastic boxes without lids: the mealworms are bred in these. The boxes should have a uniform size, as this makes it easier to stack them. Lids are not needed as the worms cannot fly.
- A sieve or litter box scoop: These should be close-meshed, as this is used to sift out the mealworms before they are relocated.
- Bedding for the boxes: For this purpose, it is best to use wheat bran, because this fulfills two factors in equal measure: On the one hand, the mealworms live and develop in it. On the other hand, mealworms can also eat wheat bran.
- Tasty and nutritious food: mealworms can develop best if they get tasty fruits and vegetables. Hard bread (alternatively buns) is also part of mealworms’ preferred diet.
- A source of warmth: Heat is important for mealworms to develop optimally. You can use heating mats, for example.
- For organization: you must document or observe the developmental stage of the mealworms well. Therefore, you should also have the following utensils ready: A calendar, a pen, and sticky notes.
Making Mealworm Farm in 10 Steps
Before you can start breeding mealworms, you need to build the “farm”. In this regard, perform the following steps:
Step 1 – Set up a mealworm farm
Place some plastic crates on a countertop. There, fill the boxes accordingly.
Step 2 – Fill the substrate
Fill each box with wheat bran, about 5 to 15 cm high.
Step 3 – Add mealworms as breeding stock
Add the purchased mealworms to the boxes.
Step 4 – Feeding the mealworms
Next, you need to add the food to the boxes. Put one to two small slices of dried bread or dried rolls in each box. Also, mealworms need sufficient moisture, which is given to them by fruits and vegetables. It is best to use varieties that do not have too much moisture. For example, we recommend apples, pears and carrots. You can cut these into small pieces and distribute them in the bran.
Step 5 – Prepare another box
When you can see that the first pupations have taken place, prepare another box to put bran into. You do not need to put food into this box.
Step 6 – Transfer mealworm pupae
Then move the pupae to the new box. To help you find all the pupae, it is best to completely dig up the substrate with your hands.
Step 7 – Transfer flour beetles
Once the pupae have developed into small flour beetles, transfer them again into another box filled with bran. You may remember the mealybugs as dark and with a firm carapace. However, in the beginning, they are small, soft, and white. Already at this stage, you need to put them in the new box. You can use a sieve for this purpose.
Step 8 – Food for the flour beetles
Put hard bread and fruits and vegetables into the box with the beetles, making sure that the cut surface must face up from now on.
Step 9 – Beetle egg-laying
In their new box, the beetles will mate, creating mealworms. For this purpose, up to 200 eggs are laid in the substrate per female during her lifetime. Hatching takes place after about three weeks.
Step 10 – Harvesting the mealworms
After three weeks at the earliest and eight weeks at the latest, the beetles are relocated to a new box. From now on they need larvae as food.
For transferring them to the new box, it is best to use the cat litter box scoop or sieve.
Important Tips for Breeding Success and Hygiene
Regular hygiene is particularly important to ensure that breeding mealworms yourself goes optimally and that you can later feed your hamsters with mealworms without spreading diseases.
Observe hygiene rules:
- Once a day, take out all old leftover fruits and vegetables from the boxes and put in new food.
- As soon as you notice that there is a lot of feces and only a little substrate left in the boxes, sift out the worms and transfer them to a new box.
- After you have emptied out a used box, which should happen fairly quickly, clean that box thoroughly. You do not need to use a strong disinfectant for this. A vinegar cleaner or dishwashing liquid will do just fine here.
- If you find moths in the bran, this is no cause for alarm. Although the moths are unpleasant, they do not have a negative effect on the breeding success of the mealworms.
- If you notice a mite infestation, immediately increase the temperature of the boxes. The bran should be about two degrees warmer than the ambient temperature for the mites to disappear.
How to Breed More Mealworms Yourself
To organize the breeding success more easily, you can work with a commercial calendar, through which you can keep track of everything.
We also recommend that you label the breeding boxes with the respective stage. If you use sticky notes, you can remove them later without leaving any residue and stick a new note.
Depending on how quickly you need the mealworms and how many there should be, you can increase the breeding success by raising the temperature. You will notice that breeding is much faster in summer, which is due to high temperatures. Therefore, we recommend using the heating mats in winter to achieve a similarly good effect.
Conclusion
Mealworms are an excellent source of nutrition for various animals and have found their niche in sustainable human consumption as well. For those who eat mealworms or use mealworms for feeding pets, the idea of starting a mealworm farm at home might be enticing. Not only are mealworms easy to raise, but raising live mealworms ensures a fresh supply for those animals, like chickens, that love mealworms.
Believe it or not, mealworms aren’t true worms. Mealworms are actually the larval stage of the darkling beetle. The life cycle of this beetle is fascinating and essential to understand if one wishes to grow mealworms efficiently. Once the darkling beetle matures, it will mate and lay eggs. Given the right conditions, these eggs will hatch into tiny mealworms. As these mealworms grow, they will undergo several molts, with freshly molted mealworms being white before they darken.
When you’re starting a mealworm farm, you’ll need a plastic container as the foundational element. At the bottom of the container, a substrate (often grains or bran) is laid, where mealworms feed. It’s crucial to provide moisture for the mealworms without making the substrate wet. Mealworms prefer a slight humidity, so you might need to raise the humidity levels moderately. On top of the substrate, you’ll often find mealworms thriving, and over time, the substrate will be depleted and need replenishment.
Be vigilant as mealworms may pull the food into the substrate or hide. To sustain a continuous supply of mealworms, you’ll have to keep the mealworm colony healthy and vibrant. This means separating mealworms and beetles, and moving beetles to a second container where they can lay their eggs and continue the reproduction process. Remember that any mealworms left unchecked will go through their life cycle and reproduce to make new mealworms.
For those raising mealworms for consumption, it’s common to store mealworms in the refrigerator to make them keep longer. When needed, simply take out the number of mealworms to use. And if ever there are dead mealworms, it’s crucial to remove them to maintain the colony’s health. Check the bin every day and take care of the mealworms to ensure a bountiful yield.
Many uses for mealworms have emerged over the years. From using dried mealworms in various culinary dishes for humans to providing mealworms for chickens—these larvae have proven to be versatile. Chickens love mealworms, and they are often used as a treat to attract them. Plus, mealworms are an alternative, sustainable protein source for those adventurous enough to include them in their diet.
In conclusion, whether you want to buy mealworms, grow your own mealworms, or delve into the intricate world of the mealworm life cycle, understanding the basics is crucial. With the right knowledge and care, raising mealworms at home can be both rewarding and sustainable. And while giant mealworms, regular mealworms, and their various stages might seem intimidating initially, with time and patience, it’s a journey worth embarking on.