Fishing can be frustrating! You might end up spending hours setting up your rig and waiting for a catch, only to end up empty-handed! Using the right bait can be a lifesaver. Among others, nightcrawlers are amongst the best worms to bring on your next fishing trip!
If you want to use nightcrawlers, you do not have to buy them every time! Instead, you can set up a mini farm in your backyard! This way, you will not only be making the most out of kitchen scraps, but you can also easily access the worms that you need as bait.
Interested in learning how to raise nightcrawlers for fishing? We got your back! Read on and learn from some of the valuable insights we’ll be sharing in this short article.
A Step-by-Step Guide for Creating a Nightcrawler Worm Bed
To raise nightcrawlers as bait for fishing, you need to create a worm or compost bed. This is where the worms will grow. This is also where you will feed them. Here is a quick guide on how you can do it like a pro:
1. Choose a Wooden Crate or Plastic Bin
Especially if you are starting your small worm farm indoors, pick a container that you can use as the worm bed. Clean the bin and drill holes. Flip it to drill holes in the bottom part. Drill 3/8-inch holes spaced at four inches. This will serve as the drainage holes. Meanwhile, on the side, use a 1/8-inch bit to drill ventilation holes.
2. Fill the Worm Bed with Paper
Now that the worm bed is ready with holes, the next thing to do is to fill it with shredded paper. This will be the preliminary bedding. First, tear the newspaper or any other paper into tiny strips. Soak the papers in a bucket with water. Remove a handful of the papers, squeeze them, and spread them at the bottom of the worm bed. Continue adding paper until its height is about a few inches.
3. Add Potting Soil
After arranging the preliminary bedding, it’s time to add the potting soil. Add three to eight inches of your choice of potting soil. The amount of soil needed will depend on the size of the worm bed. Choose a well-balanced and organic soil mix to make sure that the nightcrawlers will thrive.
4. Adds Natural Fertilizers
Once the soil is in place, you should add natural fertilizers. They will help supply the minerals needed to create a healthy environment where worms can grow. Some of the best things that you can add in the worm bed are food scraps, especially fruits and vegetables. Chicken coop and grass manure are also great. Do not add anything oily or with dairy as this can cause a rancid smell in your worm bed.
5. Put the Worms in the Bin
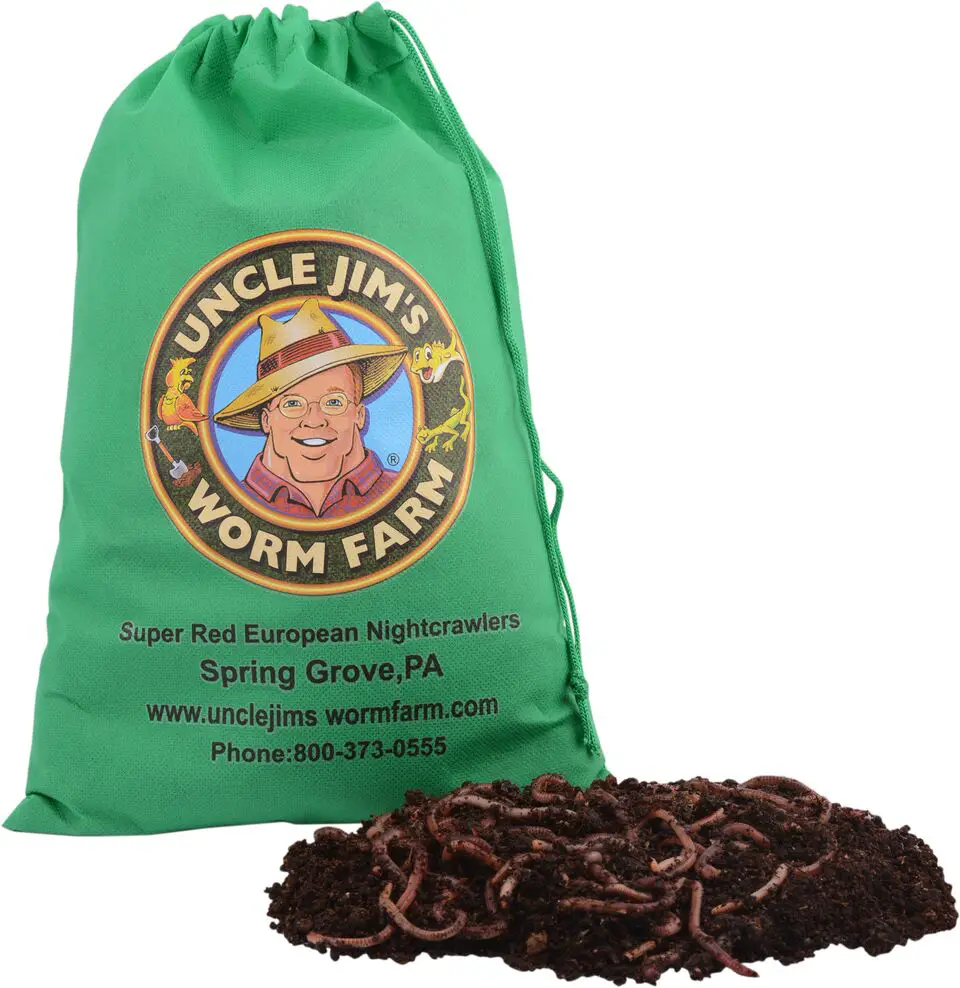
Super Reds European Night Crawlers
- Easy to raise
- Grows to 4-5″ in length (2 to 5 times bigger then regular redworms just as active)
- Heat and Cold Resistant
- Breeds quickly
- Perfect fit for any compost bin or pile
- Excellent fish bait
Everything should be ready at this point, so it is time to add the most important – the nightcrawlers. The number of worms to add will depend on the size of the container or worm bed. Avoid over-crowding. A good practice is to place two dozen worms for every square-foot space available in the bin. Once you have placed the worms, leave them on their own, and watch them grow.
Care and Maintenance of the Worm Bed
It is not enough that you know how to create a worm bed. The latter is just the start of a lengthy process of raising nightcrawlers. Here are some things to do to make sure that the worms will survive:
- Check the temperature and maintain the ideal condition to ensure the growth of the worms. Ideally, the temperature should be anywhere from 50 to 80 degrees Fahrenheit. Maintaining the right temperature might require the need to move the worm bed indoors or outdoors.
- Feed the worms and nourish the soil by adding compost materials. This isn’t one thing that you will need to do daily. A good practice is to add compost material every four days. More importantly, you should know the right materials that can yield the best benefits. Eggshells, coffee grounds, and banana peels are some of the best options.
- Replace the soil periodically. Do this at least once every few months. Scoop out the soil and replace it with a new one. Similar to what you have initially used, see to it that the soil is well-balanced and that it can supply the nutrients that worms will need. The used soil from the worm bed, on the other hand, can still be used in the garden, so it does not have to go to waste.
- Pay attention to where you will be placing the worm bed. If it is indoors, choose a place with shade. Ideally, it should be protected from the rain. When it is indoors, keep it somewhere cool and dry. As mentioned earlier, you may need to move the container around depending on the external conditions that will be best for the worms to thrive.
Harvest Nightcrawlers for Fishing
Ready for your fishing trip? It’s now time to harvest the worms. Here’s a quick guide on how you can do this:
- The simplest way to harvest nightcrawlers is to use your hand. Do not be afraid to get your hands dirty! Manually scoop a handful of soil and pick the worms individually. Transfer the worms to a container that you will bring to your fishing trip.
- Another simple method is to add food to the top of the soil. Cover the top part to keep the light out. After a week, remove the cover. Then remove the top layer of the worm bed. This will have most of the worms that you can use as bait for fishing.
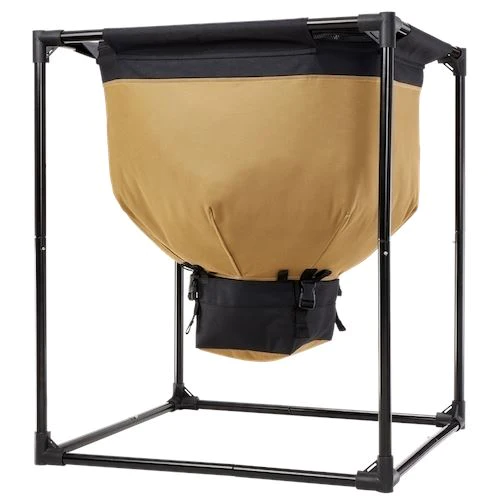
Time to choose the best worm composter
Frequently Asked Questions
What is a worm bin?
A worm bin is a container specifically designed to raise worms, typically for various purposes such as fishing bait or composting.
How can I raise worms for fishing?
To raise worms for fishing, you can create a worm bin and populate it with suitable worm species like red wigglers or European nightcrawlers. These worms can be used as live bait for fishing.
Can I use worms for fishing?
Yes, worms are frequently used as bait for fishing. Anglers often prefer certain types of worms, such as red wigglers or European nightcrawlers, due to their effectiveness in attracting fish.
What conditions should I maintain for the worms in the bin?
It is important to keep the worm bin moist, as worms require a certain level of humidity to survive and thrive
What are red wigglers?
Red wigglers are a type of worm commonly used for various purposes, including composting and fishing. They are known for their ability to consume large amounts of organic waste.
How many worms should I have in my worm bin?
The number of worms needed in a bin depends on various factors, such as the size of the bin and your intended use. It is generally recommended to have a sufficient quantity of worms to meet your specific requirements.
What type of worm is preferred for fishing?
Several worm species can be used for fishing bait, but red wigglers and European nightcrawlers are popular choices due to their effectiveness in attracting fish.
What is an angler?
An angler is a person who participates in the activity of fishing, typically for recreational purposes.
What should I use as bedding material for the worms?
Shredded newspaper is a commonly used bedding material for worms. It provides a suitable environment for the worms and is readily available.
Where should I locate my worm bin?
Your worm bin should be placed in a suitable location based on your specific needs. It can be kept either indoors or outdoors, depending on your preference and climate. Here are some things to consider when choosing a location for your worm bin:
1. Temperature: Worms thrive in temperatures between 55-77°F (13-25°C). If you live in a region with extreme temperatures, it might be better to keep the bin indoors where you can control the temperature.
2. Light: Worms prefer a dark environment, so keep the bin away from direct sunlight. If you choose to keep it outdoors, find a shaded spot or use a cover to protect it from excessive light exposure.
3. Space: Ensure that you have enough space for the worm bin. It should be easily accessible for maintenance and harvesting, and there should be enough room for the worms to move and compost.
4. Odor: Worm bins have a distinct smell, which usually isn’t unpleasant if managed properly. However, you may want to consider keeping it in a location where the smell won’t be bothersome, such as a well-ventilated area or basement.
5. Convenience: Consider proximity to your kitchen or garden when deciding where to place the bin. If you plan on using kitchen scraps for vermicomposting, having the bin close by can make it easier and more convenient to feed the worms regularly.
6. Security: If you choose to keep the bin outdoors, make sure it is protected from animals or pests that may disturb or harm the worms. You can use a sturdy lid or raised platform to deter unwanted visitors.
Remember, the location of your worm bin will depend on your individual circumstances, so choose a spot that works best for you and your worms.
Conclusion
Raising nightcrawlers as live fishing bait is a rewarding endeavor for avid anglers. The idea to raise your own worms stems from the numerous benefits it offers over buying live bait. Not only can it be more economical in the long run, but having a consistent supply of bait worms is advantageous when the urge to go fishing strikes. European and Canadian nightcrawlers are popular choices, with many enthusiasts noting that fatter worms make better bait.
When deciding to venture into this, one can purchase their worms or find nightcrawlers for sale, and introduce these worms to their new home – the bait bin. This bin can be situated either indoors or outdoors, but it’s crucial to protect your worms from extreme conditions. Keeping the temperature stable is essential, as is ensuring that the soil in your worm bed contains enough water. However, every three days or so, make sure to check the moisture levels, as there is a risk of drowning, and your worms will die if they’re submerged for too long.
Feeding is another essential aspect. Worms will consume a variety of organic matter, and to maintain their health, you can feed your worms items like crushed eggshells. As these worms eat, they grow, making them perfect worms for fishing bait. Red worms and nightcrawlers need an appropriate environment to reproduce quickly, and it’s worth noting that worms also appreciate the inclusion of premade worm food in their diet.
The option to grow worms, especially for those who regularly use worms for fishing bait, eliminates the uncertainty that comes with the bait’s quality and availability. Additionally, it’s worth noting that worms inside a well-maintained bin are less at risk of drowning than in random soil patches. By following these guidelines, anglers can ensure a consistent supply of live bait, be it red worms, European nightcrawlers, or Canadian nightcrawlers, ready for their next fishing expedition.







I am moving to Elk Rapids, MI on Bass Lake. Will start my bed in the spring. Thanks, Craig