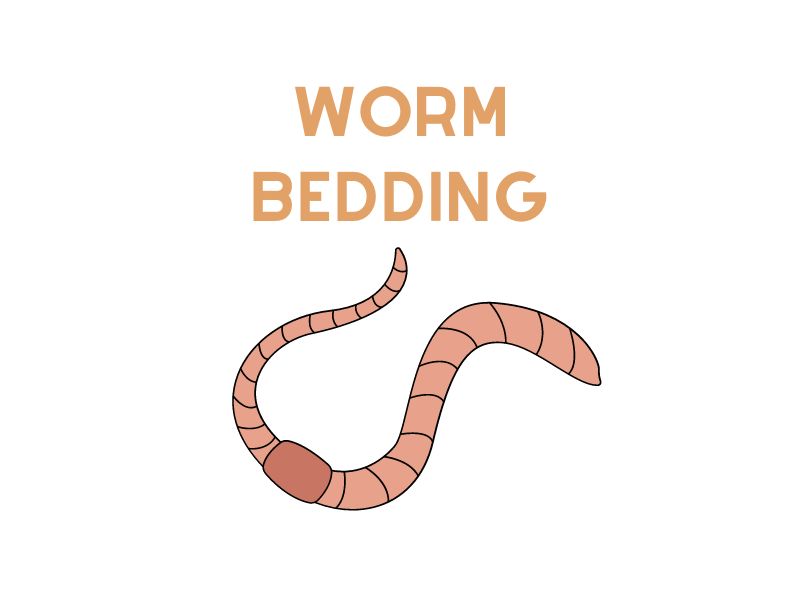
Are you interested in raising earthworms? Do you want to use them in making compost and enriching your garden soil? Then you will be delighted to know that making worm bedding in gardens is not that difficult. It is easy to make your own garden beds solely made for raising and feeding worms. Learn more about how to make worm bedding and maximize your use of your compost and kitchen waste through this article.
Worm Bedding Characteristics
Making a worm bedding is a viable move if you have sufficient space in your home and you intend to start composting the majority of your kitchen wastes and garden. With a worm bed at home, you get the chance to let plenty of worms do the composting for you. It is even possible for you to raise thousands of them, rather than just hundreds. The reason is that they can easily reproduce and break down kitchen scraps constantly.
If you are truly interested in worm bedding, then you have a couple of options, namely the following:
- Raised Worm Bed – This option is the best solution if you are looking for an easy-to-follow approach to making worm bedding. It involves building a typical raised garden bed from wood. In most cases, they are just the usual boxes made of wood and are around 3-ft. x 6-ft. long. The boxes are also full of nutrients and soil.
Your raised garden may be created in a way that can maximize sunlight exposure, but note that it will not be the case with the raised worm bed. You have to put it in a shaded spot for the most part. The reason is that the sun may dry out the bedding, causing it to become excessively warm. You can install a frame where you can drape a cloth to shade it in case there is no available shady spot in your place.
- Dug-in Worm Bed – Another way to make worm bedding is to dig it on the ground. This approach involves digging a pit, using cinder blocks, bricks, or boards to line all sides, and lining its bottom part with the aid of one corrugated cardboard layer. If you choose this approach, then be aware that you can make your worm bed in any size you want. You can just build it depending on your available space and the exact reason for making it.
Once you have picked your type of worm bedding, you need to ensure that it has the following characteristics:
Adequate moisture and oxygenation
If possible, make the worm bedding bulky enough. The bulk will help it supply plenty of tiny air pockets, thereby creating a system with more oxygenation. Also, keep in mind that worms use their skin to breathe with moisture being a vital part of the process. With that said, you should maximize your use of the increased oxygenation by using a bedding material, which is capable of absorbing a lot of moisture. The perfect worm bedding is capable of holding plenty of moisture.
Freedom and ease of movements
The worms you are raising should also be able to move freely. One advantage of ensuring that this characteristic is present in your bedding is that it allows worms to get to their sources of food easily.
Aside from that, they can also move freely in case they need to take themselves out of a problem area, like an excessively acidic or heated spot. One more thing that this can do is that it assures you of better reproduction with worms encountering each other frequently.
High carbon source
Another important characteristic that your worm bedding needs to have is a high carbon source. One reason behind it is that it aids in balancing the issues often caused by higher sources of nitrogen. It can help build a more balanced and better environment where worms can surely thrive.
Moreover, the high carbon source serves as a buffer for acidic materials. It also aids in absorbing excess moisture released by high sources of nitrogen.
Other Vital Characteristics for Your Worm Bedding
Apart from the characteristics mentioned, your worm bedding also needs to be:
- Built with a neutral PH
- Devoid of abrasive or sharp objects that might harm the sensitive skin of worms
- Odorless
- Capable of holding and absorbing moisture
- Blocking out light
- Devoid of any form of chemical
Also, remember that worms can eat good bedding. As a matter of fact, half of their diet consists of bedding. With that said, you need to find a material that can support their needs – one that acts as bedding and food.
Types of Bedding for Your Worm Bin
- Common Types of Bedding: These may consist of materials such as newspaper, cardboard, brown paper, and more. Such materials provide adequate bedding and act as a significant food source for worms. In essence, almost half of what worms consume may consist of its bedding.
- Coco Coir: Extracted from the husk of coconuts, coco coir is an excellent bedding material for your worm bin. Its fibrous texture holds moisture well, which is essential since worms live in moist conditions, resembling soil consistency.
- Grass Clippings and Coffee Grounds: Grass clippings can be used as bedding, but they must be dried out first. Green grass is too nitrogen-rich and can heat the bin. Coffee grounds, on the other hand, are excellent as they provide grit for the worms’ digestion.
Setting Up A Worm Bin
- Choice of Bedding: This is pivotal. Before adding worms, consider the bedding mix. While some prefer a combination of coco coir and shredded paper, others might lean towards aged manure and cardboard. Regardless of your choice, make sure it’s moist like a wrung-out sponge.
- Amount of Food: Feed the worms in small quantities initially. Over time, as the worm population grows, you can increase the amount of food waste you add. Always bury the food under the bedding to prevent pests.
- Bin Conditions: The bin should have enough bedding to keep the worms comfortable. If the bedding dries out, spritz it with water. Always place the bin in a shady spot to prevent overheating.
Maintaining Your Worm Bedding
Fluff the Bedding: Every week, gently turn and fluff the bedding to ensure it doesn’t compact or become anaerobic.
- New Bedding: Over time, the bedding will be consumed or converted into vermicompost. Add new bedding materials like newspaper and cardboard to ensure your worms have enough to burrow in and consume.
- Worm Blanket: This can be placed on top of the bedding to retain moisture. If you notice the bedding is getting too wet, you can add dry materials or leave the lid off on a sunny day.
Common Missteps and Precautions
- Toxic to the Worms: Ensure that the materials you add to the bedding, like newspaper and cardboard, are free from glossy prints or chemicals harmful to the worms.
- Bedding Balance: The bedding should be a balance between carbon-rich materials like paper and food waste. Too much nitrogen-rich food waste can make the bin conditions acidic.
- Worm Tea: While it’s a fantastic liquid fertilizer, it’s crucial to ensure the bin isn’t too wet. Overly moist conditions can lead to other pests invading the bin.
Best Bedding Materials
So what are the materials that you can specifically use for the worm bedding? Here are those that meet the criteria of being a bedding for worms while also serving as part of their diet.
- Brown cardboard – This material can absorb moisture well and features plenty of air pockets. Make sure to shred them into tiny pieces to improve the airflow even further and make it easier for worms to eat.
- Shredded newspaper – If you have old newspapers at home, then you can use them as a material for your worm farm bedding. It works excellently. You can just manually tear long vertical strips of the newspapers in case you have no shredder.
- Aged compost or manures – It works as a fantastic worm bedding material. You can just combine this with other materials and food scraps. The manures need to be at least six months for them to be safe for use on the bedding. Also, you can use any type, including those from goat, rabbit, and horse. However, many prefer horse manure as its nitrogen is not as high as poultry manure.
- Peat moss – This material has superior water-absorbent nature, making it great for your worm bedding. However, avoid adding too much of it because it is a bit acidic.
- Crushed dried leaves – The best ones are those derived from cottonwood, willow, elm, and maple.
The secret to keeping your worm bedding healthy is not picking a single material, though. It is the use of its different combinations. You also need to add these mixtures of materials into the bedding frequently. It is best to use different materials to strike the proper balance. This move can also help it reach the most desirable conditions, allowing the worms to survive and reproduction to take place.
How to Use and Add Bedding into the Worm Bin?
Now that you know about the different bedding materials you can use for your worm bin, it is time to start using them. Here are some simple steps that will help you start taking advantage of the materials.
Step 1 – Sort your chosen materials and remove harmful items. You can start by sorting out possible items in your home that you can safely use as materials for your worm bedding. Make sure that whatever material you decide to use, no longer has anything that can harm the worms. You should remove things like staples, wads of glue, and tape in paper as they are dangerous to the worms.
Step 2 – Begin shredding. After the sorting process, you can start shredding the materials. One thing to note when doing this step is that it would be much better to shred the materials in really small bits and pieces. That way, you can easily combine them with others and transform them into compost. Also, it is advisable to shred dry materials only if you intend to use a shredder as wet stuff may damage it.
Step 3 – Soak the shredded materials. After the shredding, it is time to soak them in water. It can help get rid of all the chemicals that are still staying in them. Also, make sure that you use moisture that worms and red wigglers prefer and enjoy.
Step 4 – Strain the materials and squeeze them to remove excess water. Note that while moisture is necessary, you need to ensure that it is not excessive. The moisture should just be enough so strain and squeeze the soaked materials to let go of any excess water. You may use a salad spinner if you are dealing with items that are quite uncomfortable to squeeze, such as wood chips.
Step 5 – Fluff then combine. The next step is to break the material apart. Note that once you squeeze it, it is possible for it to hold together and form a tight ball. Breaking it apart is necessary. After that, you can fluff up the material. It can help create important elements of the bedding. In that case, you can fold all of them together. Spread them evenly then add the worms.
Additional Tips
- Dampen the material – Remember that it is crucial to retain a moisture level of around 80% so you have to dampen your chosen material/s before putting them into the bin. The goal is to make the material resemble a damp sponge. It should be moist without dripping
- Pick readily available materials – Some examples are cardboard and newspapers. Do not forget to shred them, too.
- Lift the bedding material a bit – Fluff it, as well, to make some air space and avoid compacting. Do this once a week so it will not cause an unwanted foul odor and anaerobic decomposition resulting from materials matting together in big chunks.
- Mix bedding with worm food – This means that every time you add worm food to the bin, you have to mix it with the bedding. It is a big help in optimizing the rate of decomposition.
- Ensure that the topmost part has a thick and dry layer – Maintain it and top it up frequently. It is because this topmost part will eventually accumulate moisture that may cause it to shrink down.
Frequently Asked Questions (FAQs)
How deep should a worm bedding be?
If you are a beginner, you may want to start making shallower and smaller worm bedding. That is actually okay, but be aware that digging an even deeper bed is not that troublesome. It would also be much better to dig a deeper bed as it also means more compost and worms for you. You may want to start at 10 to 12 inches and go at around 18 to 36 inches of depth eventually.
How often should I change worm bedding?
Once you already have your worm bedding, changing it regularly is necessary. The most prominent sign that indicates it is time to change the bedding is when it gets too concentrated due to the worm castings. Also, you can determine the frequency and the exact time of changing the bedding based on the number of worms you are raising and the amount of bedding you have.
If you have plenty of worms, then it would be necessary to change the bedding more frequently. One more thing that you have to take note of is the material used for the bedding. For instance, if you are using peat moss, then you need to change it every two weeks. This is essential in ensuring that protein poisoning does not happen in worms as such a case may kill them.
How wet should the worm bedding be?
Your worm bedding needs to have the right level of moisture for it to thrive. If the moisture or water is too much, then it is possible for the bin to look muddy and produce a foul smell. An excessively wet worm bedding may also significantly lower the oxygen available for the worms. However, the moisture should not also be insufficient. You have to prevent it from becoming too dry.
The goal, therefore, when making a worm bedding is to prevent it from becoming too dry or accumulating too much standing water. In this case, the rule of thumb is to give the worm bedding around 80 percent moisture. You should be able to feel the moisture without seeing any water dripping. Every time you squeeze the bedding, it should not also produce any crackling sound from dry leaves or dry paper.
What is worm compost?
Worm compost, also known as vermicompost, is a nutrient-rich organic fertilizer produced by worms digesting organic materials.
What is a compost bin?
A compost bin is a container used to hold organic materials, such as kitchen scraps and yard waste, that decompose into compost.
What is the best type of worm for composting?
The best worms for composting are red wigglers, also known as Eisenia fetida. They are efficient decomposers and thrive in worm bins.
Can I use shredded cardboard as bedding for my worms?
Yes, shredded cardboard is a great bedding material for worms. It provides a carbon source and helps maintain moisture in the worm bin.
What is coconut coir and can I use it for worm bedding?
Coconut coir is a natural fiber extracted from coconut husks. It can be used as bedding material for worms, as it retains moisture well.
Can I use compost as a fertilizer?
Yes, compost can be used as a fertilizer, as it enriches the soil with nutrients and improves its structure. It is an excellent organic option.
Can I use potting soil as bedding for my worms?
Potting soil is not recommended as bedding for worms, as it may contain additives and chemicals that can be harmful to them. It is best to use organic bedding materials.
Do worms live long?
Worms have a relatively short lifespan, typically ranging from 1 to 5 years, depending on their species and environmental conditions.
How do I start a worm compost bin?
To start a worm compost bin, you will need a container, bedding material, worms, and organic waste. Follow these steps: (1) Set up the bin with bedding, (2) Add the worms, (3) Begin feeding organic waste, (4) Maintain proper moisture and temperature.
How do I set up a worm compost bin?
To set up a worm compost bin, you will need a container with a lid, bedding material, and worms. (1) Prepare the bedding, (2) Add the worms, (3) Place the bedding and worms in the container, (4) Keep the bin in a suitable location, (5) Start feeding organic waste.
Conclusion
Learning how to make your own worm bedding is a big help in reducing and recycling organic waste. This means you won’t have to throw anything out. It can also produce compost, which can benefit your gardens, potted plants, flower beds, or anything that can survive in soil rich in nutrients. Just make sure to learn how you can maintain your worm bedding to keep the worms inside its content and happy.